
Freehand sketching lets you communicate design ideas and shape solutions quickly without reaching for a ruler or compass. In the exam, you will sketch 3D pictorial views from given orthographic views, draw flat 2D views onto square grids, identify solids of revolution, and render surfaces to show form.
3D Pictorial Sketching and Crating
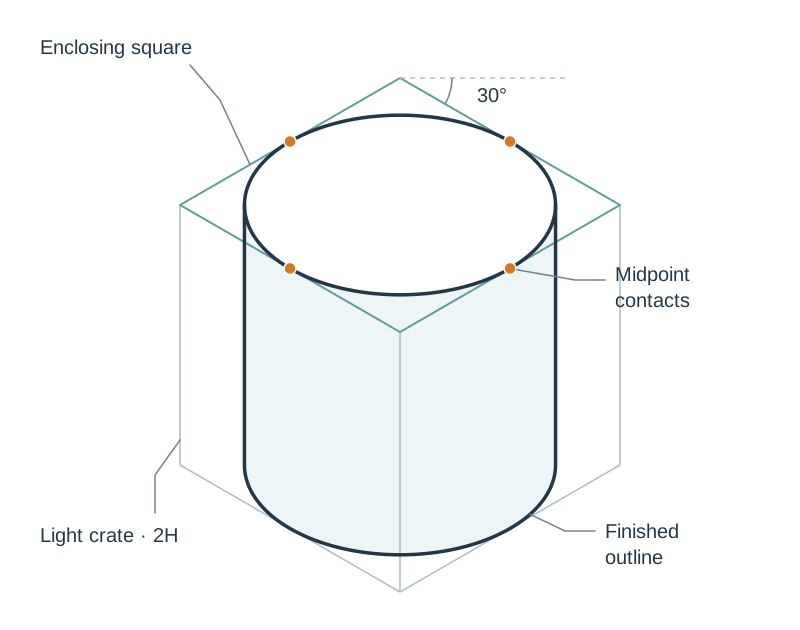
A pictorial sketch shows length, width, and height together in one 3D view. Isometric sketching is the standard method here: upright lines stay vertical, while receding side lines slant at roughly 30° to the horizontal.
To keep your sketch in proportion, use the crating technique:
- Block out a light bounding box with a 2H pencil matching the overall height, width, and depth of the object.
- Locate features in proportion within the crate; add or remove blocks, then connect the correct corner points.
- Sketch the enclosing square along the two isometric directions of its face; draw an ellipse touching each side's midpoint.
- Use a sequence of small sketches to show changes from your first idea to your solution.
- Add short notes explaining changes, such as "Wider base improves stability".
Freehand 2D Views and Grids
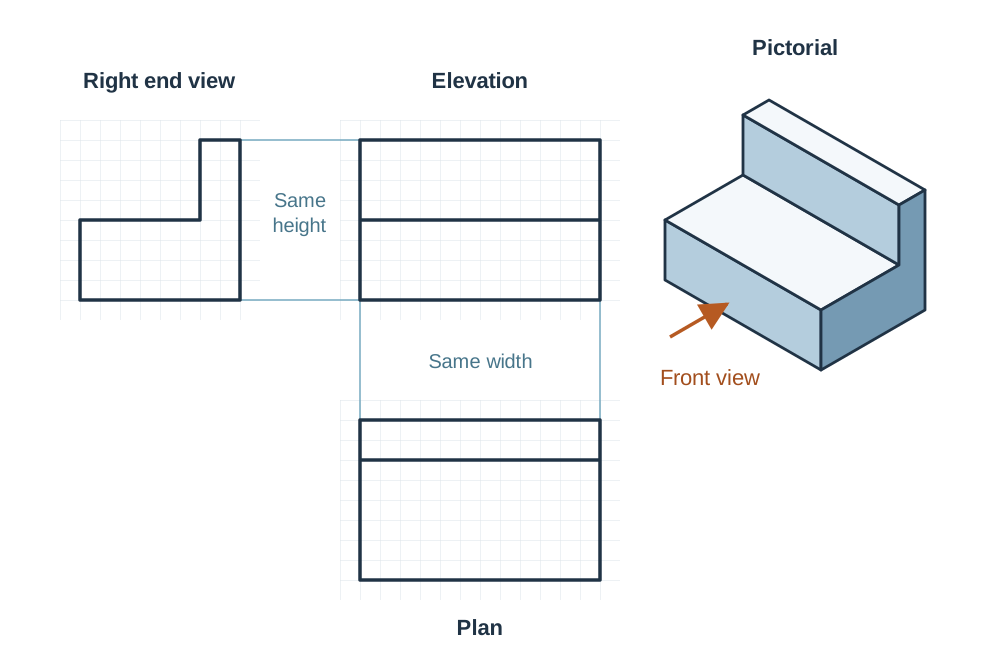
Exam questions often give you a 3D object and ask you to sketch its flat 2D views on a printed square grid.
- The elevation shows the front face looking in the direction of the given arrow.
- The plan shows the view straight down from above and must sit directly beneath the elevation so their widths line up.
- An end view shows the side profile, matching the height of the elevation.
- Count grid squares to keep the parts in correct proportion.
- Use dashed lines for hidden detail to show edges concealed inside or behind the solid shape.
Never use a ruler for these questions. Move your arm from the shoulder to pull confident, straight freehand lines between marked endpoints.
Solids of Revolution
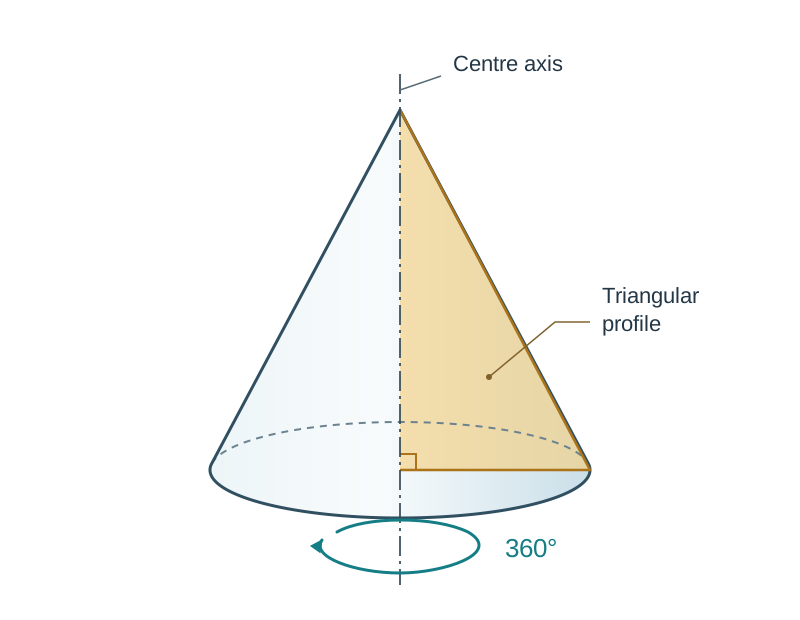
A solid of revolution is a 3D shape created by rotating a flat 2D profile 360° around a fixed centre axis. The axis acts as a centre line, creating a completely symmetrical object.
Learn these standard pairings for the exam:
- A rectangle revolving on one edge forms a cylinder.
- A right-angled triangle revolving on its upright height forms a cone.
- A right-angled trapezium revolving about its side perpendicular to the parallel sides forms a truncated cone.
- A semicircle revolving about its diameter forms a sphere.
- A suitable bottle half-profile revolving about its centre line forms a bottle.
When sketching them, draw the profile on one side of the axis, mirror it onto the other side, and cap circular ends with ellipses.
Surface Shading and Rendering
Rendering adds tone, colour, and texture to flat linework so an object looks solid and realistic. When asked to colour or shade, either coloured pencil or graphite shading can be used.
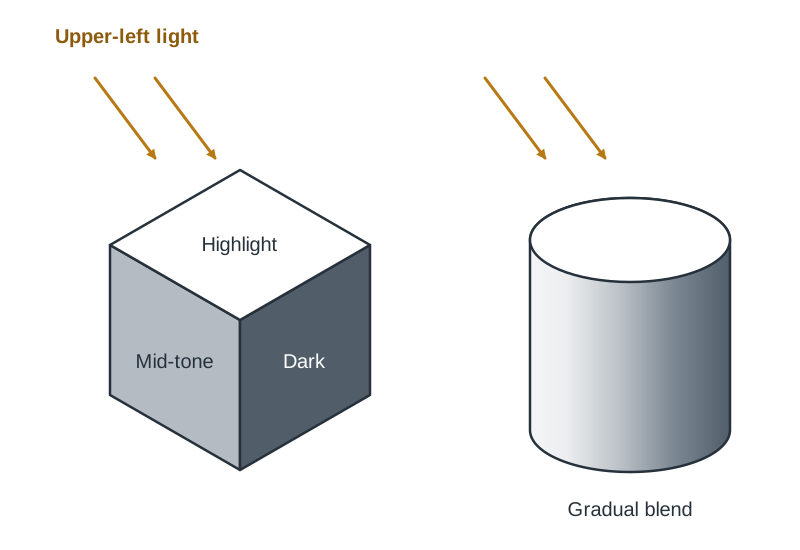
- Fix a single light source in your mind, usually coming from the top-left.
- Leave surfaces facing the light bright or plain white as a highlight.
- Add a medium tone to angled surfaces catching partial light.
- Shade surfaces facing away from the light in dark tones.
- On cylinders, blend tone gradually around the curve, keeping the lit side lighter and the opposite side darker.
Key terms
- Freehand sketch
- A drawing completed by hand without using drafting equipment like rulers, set squares, or compasses.
- Crating
- Drawing a light preliminary 3D box to establish overall proportions before sketching the object features inside.
- Isometric
- A 3D drawing method using vertical lines and receding lines angled at roughly 30° to the horizontal.
- Ellipse
- A smooth oval curve that represents a circle when viewed at an angle or on an isometric plane.
- Solid of revolution
- A symmetrical 3D solid generated by rotating a flat 2D shape 360° around a central axis line.
- Hidden detail
- Dashed lines on a technical drawing that represent edges concealed from direct view.
- Rendering
- Applying shading, colour, or texture to a drawing to communicate 3D form, light, and surface finish.
Check yourself
What 3D solid is formed when a right-angled triangle is revolved fully about its vertical height?
A cone.
What angle do receding lines follow in a standard isometric sketch?
Roughly 30° to the horizontal.
What line type shows an unseen internal edge in a 2D sketch?
A dashed hidden detail line.
Why do we sketch a light crating box before drawing object features?
It establishes correct overall height, width, and depth proportions before adding detail.